This comprehensive guide provides a step-by-step approach to successfully deploying the College Board's Bluebook app on Chromebooks, ensuring a smooth and efficient testing experience for your school. We'll cover pre-installation checks, the installation process itself, troubleshooting common issues, and post-installation best practices. For more information, see the Bluebook Chromebook guide.
Getting Started: Pre-Installation Checklist
Before initiating the Bluebook app deployment, several crucial pre-installation checks are necessary to ensure a seamless process. These proactive steps significantly reduce the likelihood of encountering problems during the actual deployment.
Chromebook Inventory: Begin by creating a complete inventory of all Chromebooks to be used. This detailed list facilitates efficient tracking and troubleshooting. Knowing precisely how many devices you are managing is the first step towards success.
Chrome OS Update: Ensure all Chromebooks are running the latest version of Chrome OS. Outdated software can lead to compatibility issues. This simple step prevents potential complications later on. Regular updates are vital for optimal performance and security.
Battery and Power: Verify that all Chromebooks have sufficient battery power or readily available access to power outlets. Uninterrupted power supply prevents test disruptions. Plan for power needs during testing – a dead battery mid-exam is unacceptable.
Network Connectivity: Confirm reliable network connectivity for every Chromebook. Test Wi-Fi signals and consider wired connections for enhanced stability. A strong and consistent internet connection is non-negotiable. Network issues are one of the most common reasons for the app not working.
Installing the Bluebook App: A Detailed Guide
This section outlines the precise steps for installing the Bluebook app, including the necessary extension, within the Google Admin console. These steps require administrator privileges within your Google Workspace account.
Google Admin Console Access: Log in to your Google Workspace Admin console using your administrator credentials. This is the central management hub for your school's Google services and devices.
Navigate to Device Management: Locate the "Devices" section, then select "Chrome." This section allows management of your school’s Chromebooks.
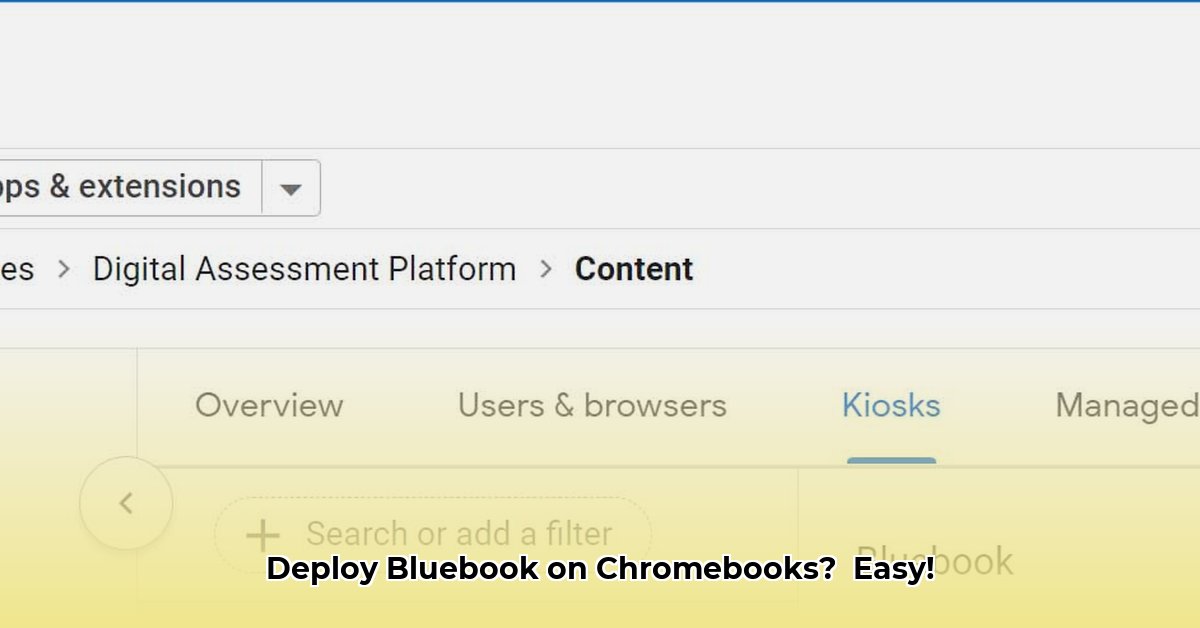
Locate Kiosk App Settings: Navigate to the "Settings" section, then find "Kiosk apps." Click "+ Add" to begin the installation process. This feature restricts the Chromebook to solely running the Bluebook application, eliminating unwanted distractions during testing.
Input the Bluebook App URL: Paste the official Bluebook app URL for Chromebooks into the designated field. Ensure accuracy – an incorrect URL will prevent the app from functioning. This URL is provided by the College Board and is critical for the deployment process.
Enable Auto-Launch (Recommended): Enable the "Auto-launch" option, automatically initiating the Bluebook app upon Chromebook startup. This simplifies the testing process for students and staff. Auto-launch ensures a consistent and straightforward user experience.
Install the Required Extension: The College Board typically requires a specific extension alongside the application. Follow their instructions carefully to install this extension. This extension is crucial for the app's proper functionality; installation is mandatory.
Save Configuration and Allow Propagation: Save the configuration changes. Allow several minutes for the changes to propagate across your network before testing the application. Premature testing can lead to errors or unexpected behaviors. Patience is key here.
Troubleshooting Common Issues: Addressing Potential Problems
Despite careful planning, unforeseen issues may arise. This section provides solutions for common problems.
App Failure to Launch: Verify the accuracy of the URL and the correct configuration of kiosk mode. Try restarting the Chromebook. If problems persist, consult the College Board's troubleshooting documentation. Their online resources are invaluable.
Network Connectivity Problems: If a Chromebook cannot connect, investigate the network's health. Check Wi-Fi signal strength and consider alternative connection methods if possible. Network speed and reliability are essential for the application's performance.
Extension Installation Errors: Guarantee the correct extension ID is used and administrator settings are correctly configured. Incorrect IDs will prevent the extension from working. Double-check all parameters.
Post-Installation Best Practices: Maintaining Optimal Performance
Maintaining a smoothly functioning Bluebook app requires consistent attention and proactive measures.
Regular Updates: Routinely update both the Bluebook app and Chrome OS to address bugs, enhance features and address security vulnerabilities. Timely updates are essential for optimal performance and data security.
Security Audits: Conduct regular security audits to protect sensitive student data. Ensure compliance with all pertinent regulations. Data security is paramount.
Performance Monitoring: Monitor app performance, network speed, and battery life. Early detection of minor issues prevents larger problems from arising. Proactive monitoring is key to preventing larger issues.
By diligently following these steps, schools can efficiently and effectively deploy the Bluebook app on their Chromebooks. Remember, proactive planning and consistent maintenance are fundamental to ensuring a seamless testing experience.
⭐⭐⭐⭐☆ (4.8)
Download via Link 1
Download via Link 2
Last updated: Sunday, April 27, 2025